What CodeCrab is
- • A desktop app that reviews GitHub pull requests with AI.
- • It runs on your own tools: the GitHub CLI (
gh) and Claude Code (claude), using your accounts. - • It is read-only toward GitHub. It never posts comments, approves, or pushes. You copy what you want and paste it yourself.
- • It reads your local clone to understand the code and never edits it.
Install the app
macOS
- Download the
.dmgfor your Mac: Apple Silicon (M1 and newer) or Intel. - Open it and drag CodeCrab into Applications.
- Open CodeCrab from Applications. The app is signed and notarized by Apple.
Windows
- Download the
.msior.exe. If your browser says it is not commonly downloaded, choose Keep. - When you see Windows protected your PC, click More info, then Run anyway.
- Finish the installer and open CodeCrab from the Start menu.
Updates
When a new version is ready, an Update to vX chip appears in the top bar. Click it, then Update now. The app restarts on the new version. Later hides it for 24 hours.
Get the green checks
The top bar has three badges: gh, claude and jira.
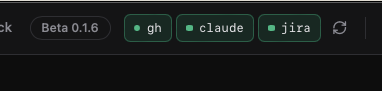
| Badge | Meaning |
|---|---|
| Green | Installed and signed in. Ready. |
| Orange | Missing or not signed in. Click it for setup steps. |
| Pulsing grey | Checking right now. |
Click an orange badge to open its setup card. Each command has a Copy button. When finished, click Re-check Status.
3.1 GitHub CLI — required
CodeCrab uses gh to list PRs, read diffs and read comments.
# Install GitHub CLIbrew install gh
# Install GitHub CLIwinget install --id GitHub.cli --source winget
No Homebrew or winget? Download the installer from cli.github.com.
# Sign in, then verify the sessiongh auth login
gh auth status
3.2 Claude Code — required
CodeCrab runs reviews through your local Claude Code, so it must be installed and signed in on this computer.
# Install Claude Codecurl -fsSL https://claude.ai/install.sh | bash
# Install Claude Codeirm https://claude.ai/install.ps1 | iex
Already use Node.js? You can install it with:
npm install -g @anthropic-ai/claude-codeRun Claude and complete the login in your browser:
claude3.3 Jira — optional
Add Jira only if your team links tickets in PRs. It adds an Open KEY button and lets reviews use the ticket as the specification.
# Install Atlassian CLIbrew tap atlassian/homebrew-acli
brew install acli
On Windows, follow Atlassian’s Windows guide.
# Sign in and verify Jiraacli jira auth login --web
acli jira auth status
Add your repositories
Each repo needs its GitHub URL and a local clone on this computer.
# Only if you do not have a local clone yetgit clone <repo-url>
Open Settings (gear icon) → Repositories.
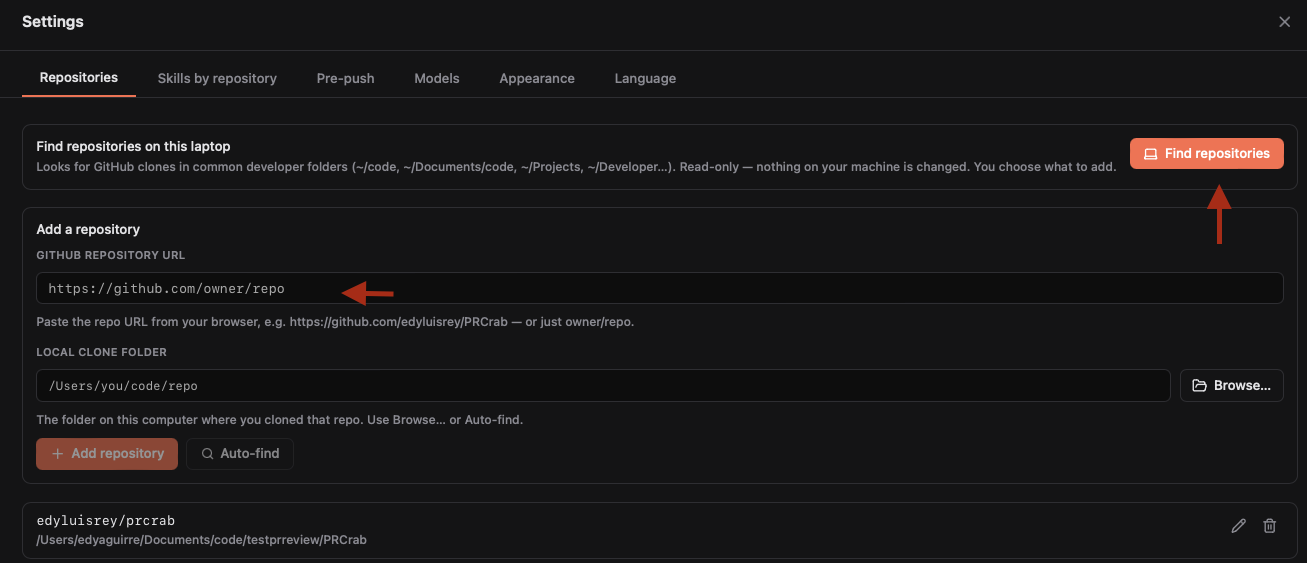
Fast way: let CodeCrab find them
- Click Find repositories. CodeCrab checks common folders and only reads them.
- Review the list. Recommended repos have PRs waiting for you; On GitHub means verified; Not verified appears when gh is not ready.
- Select the repos you want and click Add selected.
Manual way
- Paste the GitHub URL, such as
https://github.com/acme/web-apporacme/web-app. - Click Browse… to choose the local clone, or use Auto-find.
- Click Add repository. Use the pencil icon later to fix its local path.
Set up skills
Skills are the instructions the AI follows. CodeCrab creates them for each repository from your actual code.
Open Settings → Skills by repository and select the repo under Active repository.
5.1 Review Profile — automatic
- • Generated once the repo has a local path. It scans the codebase, CI and conventions and may take a few minutes.
- • View Profile shows its rules. Evidence shows where each rule came from.
- • Use Regenerate after major changes. CodeCrab warns when a profile is 30+ days old.
5.2 Master Review Agent — always on
The main reviewer runs on every review. Click View Skill File to read it. Nothing needs configuring.
5.3 CodeCrab review skills
Extra review passes are generated independently after the Review Profile is ready.
| Skill | Default | Use it for |
|---|---|---|
| Repo-adapted peer review | On | A second reviewer that knows your repo’s conventions. |
| Security review | Off | Auth, injection, secrets and data exposure. |
| Test completeness review | Off | Missing or weak tests for the change. |
Enable skills with their checkbox. View skill explains its scope and source. Regenerate rebuilds one skill without touching the others.
5.4 Reuse your own skills
Existing Claude Code skills in .claude/skills or ~/.claude/skills appear under Your own review skills. Select one to run it on every review.
- Click Template prompt to create your local skill.
- Copy the prompt and paste it into Claude Code inside your repo.
- Let Claude create
.claude/skills/review-peer-pr/SKILL.md. - Reopen the tab and select the new skill.
5.5 Additional notes
Add context every review should know, such as “we’re migrating off Redux” or “ignore the legacy folder,” then click Save & sync.
Language, model and appearance
Language
| Setting | Controls |
|---|---|
| App language | The interface. |
| Review language | Findings, deep dives and follow-up answers. |
| PR comment language | Paste-ready comments. Auto matches the language already used in the PR. |
Model
| Option | When to use |
|---|---|
| Local default | Whatever your claude CLI already uses. |
| Opus | Deepest analysis. Slowest and uses the most quota. |
| Sonnet | Balanced. A good default. |
| Haiku | Fastest and cheapest, with shallower findings. |
Appearance
Under Settings → Appearance, choose Small, Default, Large or Extra large text. Shortcuts: Cmd/Ctrl +, Cmd/Ctrl - and Cmd/Ctrl 0. Use the top-bar theme icon for light or dark mode.
Review a teammate’s PR
Set the top switch to PR code review and choose the repository.
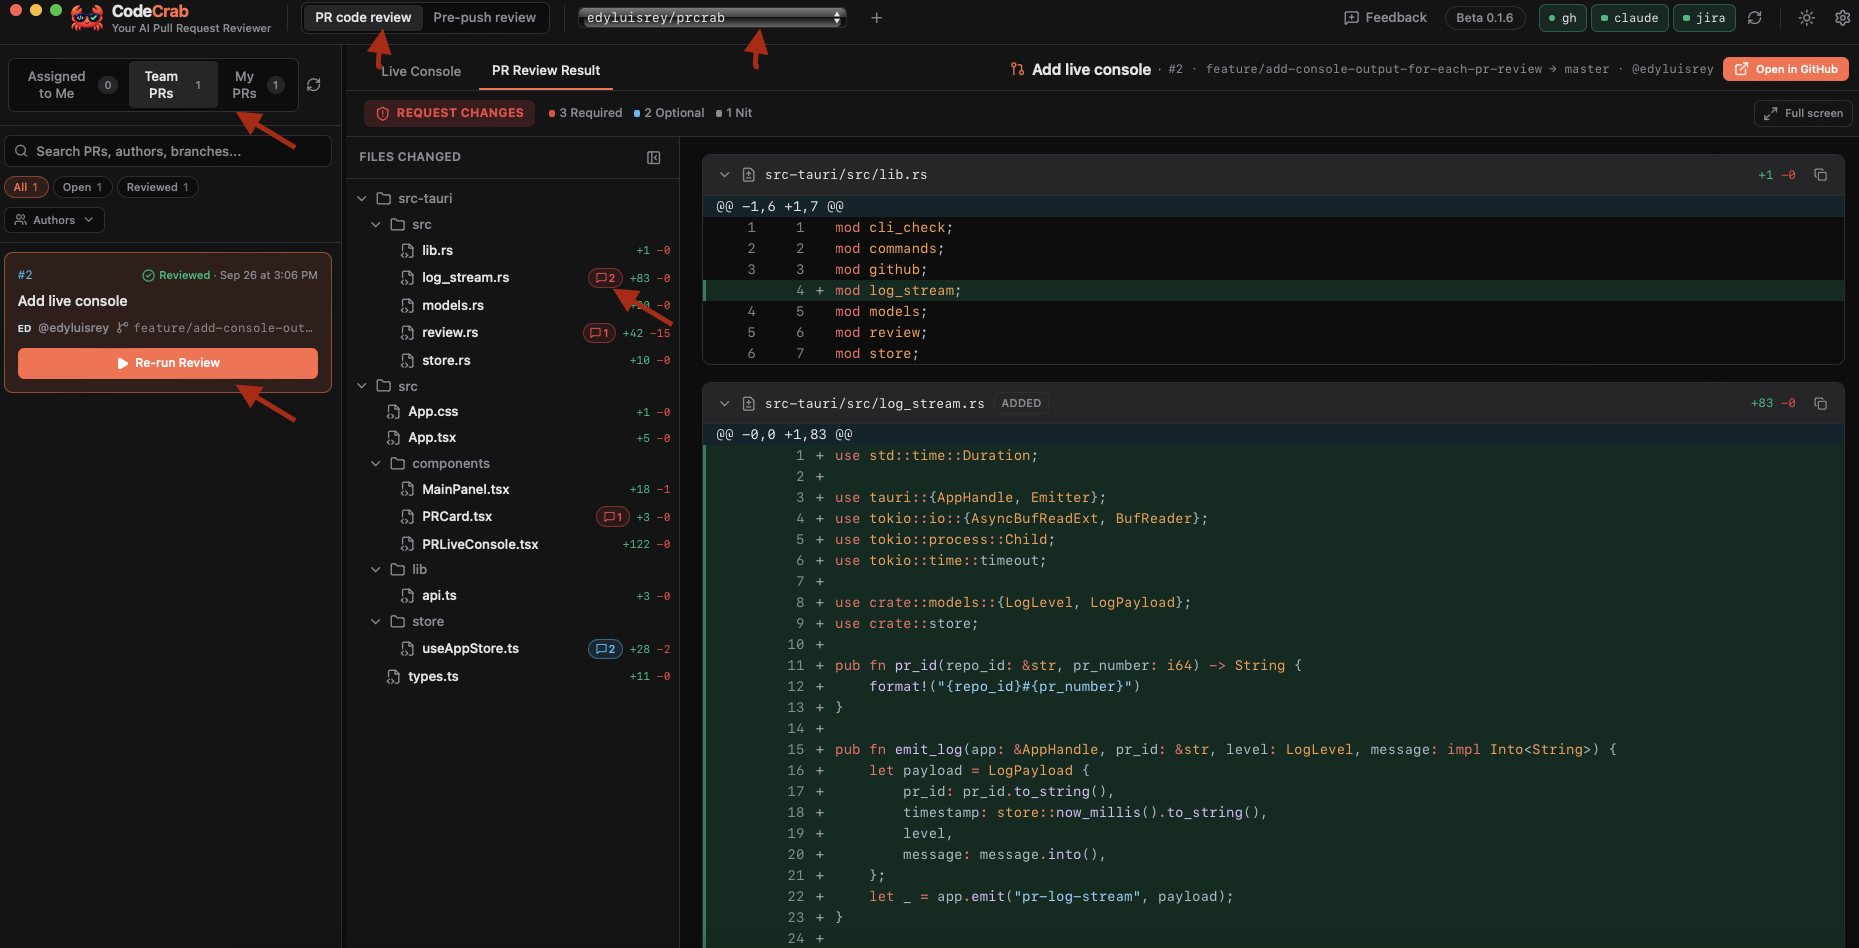
7.1 Find the PR
- • Assigned to Me: PRs where you are an assignee or requested reviewer. Start here.
- • Team PRs: every other open PR in the repo.
- • My PRs: PRs you opened.
Use search, status filters and Authors to narrow the list.
7.2 Run the review
- Open a PR and click Start Review.
- Watch progress in Live Console.
- When it finishes, open PR Review Result.
7.3 Read the result
The verdict is Ready to Approve or Request Changes. Findings appear directly on relevant diff lines; general findings appear above the diff.
| Severity | Meaning |
|---|---|
| CRITICAL | Blocks merge: security, data loss or broken behavior. |
| REQUIRED | Must fix before merge. |
| OPTIONAL | Worth considering. |
| NIT | Minor or style. |
Every finding includes the Problem, Why it matters, Suggested Fix and a paste-ready Suggested PR Comment.
7.4 Act on a finding
- • Copy PR Comment copies the ready-to-paste comment.
- • Open on GitHub opens the exact line in the Files tab.
- • Investigate Finding opens a read-only deep dive with call traces, affected files and fix steps.
- • Use Re-run Review when new commits arrive.
My PRs: understand feedback
Use this workflow to handle feedback reviewers left on your PRs.
- Open My PRs and select your PR. CodeCrab syncs the diff and GitHub comments.
- Inline comments appear on their lines. General comments are listed separately.
- Choose Investigate comment for a read-only explanation and fix plan, or View on GitHub to reply.
Pre-push review
Review local changes before pushing and catch problems before a teammate does. This workflow uses local git and never touches GitHub.
- Switch the top toggle to Pre-push review.
- Open the branch card to inspect your local diff, base branch and commits ahead.
- Choose whether to include staged and unstaged changes.
- Click Start Review.
- Read findings and the Ready to Push or Request Changes verdict.
- If code changes, use Re-run Review from the Outdated banner.
Select the skills used here under Settings → Pre-push. These can differ from your PR review skills.
Quick reference and FAQ
First review checklist
- Install CodeCrab.
- Make
ghgreen withgh auth login. - Make
claudegreen with a paid plan and signed-in CLI. - Add a repository with its local clone.
- Wait for Review Profile: Ready.
- Open Assigned to Me → PR → Start Review.
Frequently asked questions
A badge stays orange after I installed the tool.
Quit and reopen CodeCrab, then click Re-check Status. Verify gh auth status and claude in a terminal.
“Generate a Review Profile first” or profile missing.
The repo has no local path. Add it in Settings → Repositories; the profile then generates automatically.
No PRs in the sidebar.
Confirm the right repo is selected and gh is green, then use the sidebar refresh icon.
Will CodeCrab comment, approve or push for me?
No. Reviews are read-only. You choose what to copy and paste.
Does it change my local repo?
No. It reads the clone for context. Pre-push only reads the local diff.
Reviews use a lot of my Claude quota.
Choose Sonnet or Haiku under Settings → Models and enable only the skills you need.
Something broke, or I have an idea.
Click Feedback in the top bar and tell us what happened.